Home » Product Performance Ratings: Resources »
What Are Stitch Counts and Why Are They Important?
Last Updated: 18 July 2025
Stitch counts are your secret weapon if you’re crafting custom polo shirts, caps, or tailored garments. This essential measure ensures your work is durable, precise, and looks fantastic. Whether embroidering a logo or sewing a uniform, understanding stitch counts unlocks professional results. Let’s break down what stitch counts are—why they matter for custom branding, and how to use them to shine.
Grasp the Basics of Stitch Counts 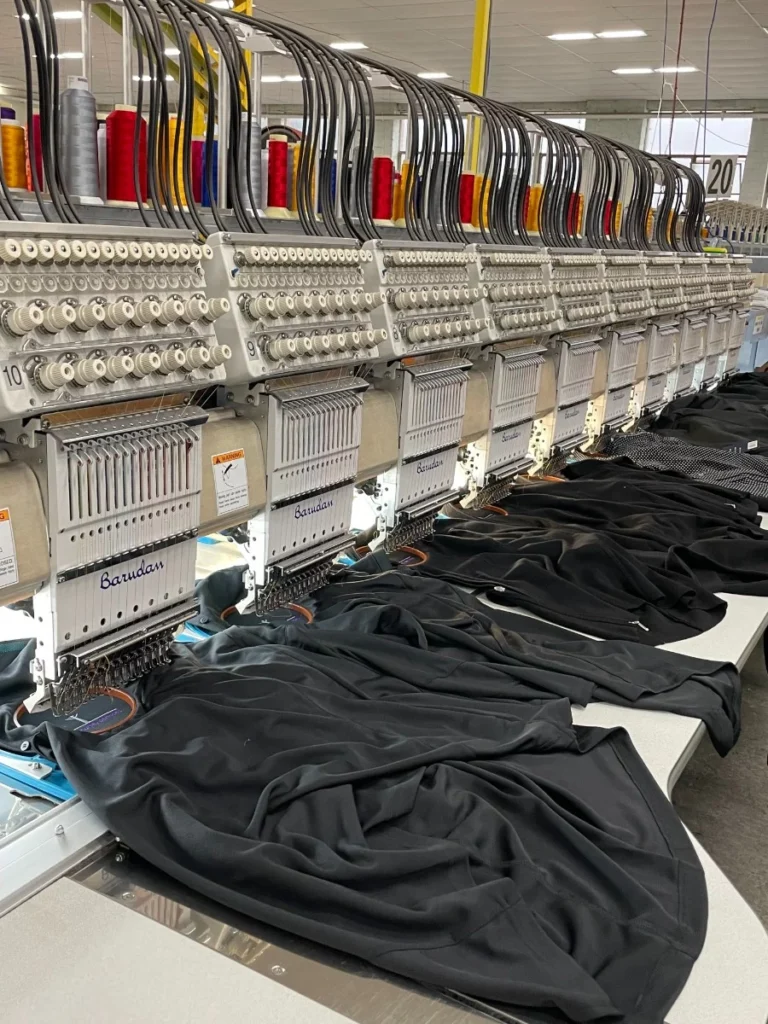
A stitch count tracks the number of thread loops—or stitches—in a specific part of your project. It’s a vital tool in sewing, knitting, crocheting, and embroidery, keeping everything consistent and accurate. In custom branding, stitch counts make embroidered designs clear and long-lasting. In garment making, they also ensure pieces fit together perfectly, keeping sizes and shapes uniform. You avoid mistakes, align patterns, and create high-quality, professional work by mastering stitch counts.
Prioritise Stitch Counts for Stellar Custom Garments and Branding
Stitch counts might sound technical, but they’re important for how your project turns out—both in strength and style. The following are the reasons why mastering stitch counts matter:
- They help everything fit just right: When your stitch count is on point, all your garment pieces come together the way they should. That’s a big deal for things like branded corporate uniforms, where a good fit isn’t just nice—it’s expected.
- Increase Durability: More stitches create stronger seams, preventing fraying, stretching, or puckering—key for promotional items with heavy use.
- Enhance Brand Appeal: In embroidery, higher stitch counts produce sharp, vivid logos, making polos, caps, or bags look polished and professional.
- Match Fabrics: Different fabrics need specific stitch counts. Heavy ones like denim require 8–10 stitches per inch for tough seams. While lighter ones like cotton need 6–8 for flexibility.
Fabric type, thread, and sewing machine settings affect stitch counts. So, you need to adjust accordingly. Too few stitches weaken seams. While too many can warp fabric. Choosing the right stitch count also ensures lasting quality and a sharp finish for personalised apparel or personal sewing projects.
Choose the Best Stitch Types for Your Goals 
Stitch count pairs with stitch type, and each type has a unique purpose for your project’s look and function. As an expert, picking the right stitch type is key. Here are the main ones and their uses:
- Plain Stitch: A basic straight stitch for seams or hemming, great for simple garment work and entry-level embroidery.
- Backstitch: A sturdy stitch for strong seams, ideal for custom apparel such as jackets or heavy uniforms.
- Zigzag Stitch: Adds stretch and stops fraying, perfect for stretchy fabrics or decorative edges on branded items.
- Cross-Stitch: A counted stitch for detailed patterns for intricate embroidery on patches or special projects.
- Chain Stitch: Creates textured, looped designs, adding flair to bags or quilts for branding.
- Blanket Stitch: A chain stitch style for fringed edges, excellent for finishing blankets or custom accessories.
Set the Right Stitch Counts for Your Projects
Choosing the best stitch count depends on your project and material. Here’s expert guidance:
- Custom Caps: Use 6–8 stitches per inch for a clear, lightweight logo that fits the fabric.
- Polo Shirts: For embroidered designs, go for 8–10 stitches per inch, ensuring durability and a professional look for business branding.
- Jackets or Denim: Select 8–10 stitches per inch for seams that handle tough wear.
- Light Fabrics (e.g., Cotton or Linen): Choose 6–8 stitches per inch to keep flexibility and avoid puckering.
Test stitch counts on a fabric scrap to check fit. For embroidery, use software to estimate logo stitch counts, balancing detail with production time, as higher counts take longer. This approach meets client needs and industry standards.
Perfect Your Stitch Counting Skills
Counting stitches accurately is necessary for consistent sewing, knitting, crocheting, or embroidery results. Try these expert tips:
- Know Your Stitch: Understand what counts as a stitch. In sewing, it’s each thread loop; in cross-stitching, it’s each “X”; in knitting, it’s each loop on the needle.
- Use Handy Tools: To stay on track, place a stitch marker at the row’s start or use a digital row counter for long sections.
- Break It Up: Count long rows in small groups (e.g., sets of 10 stitches) to avoid mistakes and simplify the task.
- Check Fabric Threads: For cross-stitching, count holes per inch on the fabric for even, polished stitching.
Keeping an eye on your stitch counts as you go helps catch mistakes early. This also keeps your project looking clean and professional from start to finish.
Bring Your Brand to Life with Perfect Stitching
Stitch counts are the magic behind great sewing and custom branding—they bring everything together with precision, strength, and a polished finish. When you choose the right stitch types, match them to your fabric, and keep your counts accurate, you’ll end up with apparel and promo gear that stands out.




 Sale
Sale
 Corporate Uniforms
 Eco Apparel
 Hoodies & Sweaters
 Jackets
 Kids' Clothes
 Other Apparel
 Polo Shirts
 Socks
Socks Shoes
Shoes Sports Bottoms
 Sports Uniforms
 Singlets
 Tee Shirts
 Workwear
 Briefcases
 Dry Bags
 Laptop
 Satchels
 Specialised Bags
 Tote Bags
 Beanies
 Caps
Caps Straw Hats
 Bottled Water
 Drinkware Gift Sets
 Glass & Poly Cups
 Mason Jars
 Stubby | Bar & Drinkware
 Wines
Wines


 Business Card Holders
 IT Gift Sets
 Tech Computers
 Beach Towels
 Car Accessories
 Golf
Golf Lighters
 Picnic Gear
 Sports Items
 Sunscreens
 Markers
 Post-It & Sticky Notes

 Card Decks
 Coin Banks
 Conference Toys
 Event Toys
 Frisbees
 Games & Puzzles
 Kids
Kids Plush Toys


 Print | Signage
 Antibacterial
 Eco Products
 Gift Box Sets
 Homeware
 Pet Products
 Personal Care
 Occasion Ideas